How to Descale a Keurig
(Step-by-Step Guide)
QUICK ANSWER
How to Descale a Keurig Coffee Maker?
- Empty the reservoir and remove any K-Cup pod.
- Remove the water filter if your model has one.
- Add descaling solution and fill to the line with fresh water.
- Run brew cycles with no pod inserted — discard each cup of hot liquid.
- Activate descale mode if your model supports it.
- Rinse the reservoir thoroughly.
- Run fresh-water rinse cycles until the water smells and tastes neutral.
- Confirm the descale light has turned off.
For general coffee makers, drip machines, and non-Keurig brewers, see our full guide on how to descale a coffee maker.
What Does Descale Mean on a Keurig?
A note from experience
Hard water leaves its mark everywhere it flows.
Signs your Keurig Needs Descaling
Your Keurig won’t always announce a problem with a flashing light. Sometimes the symptoms creep in so gradually that you barely notice, until one morning your cup of coffee tastes like disappointment and the brew cycle sounds like a diesel engine. Know what to look for.
- Slow brewing. A healthy Keurig brews fast. If your cycle is noticeably dragging, scale is almost certainly restricting the water path.
- Smaller cups than selected. You pressed 12oz. You got something closer to 7oz. Scale reduces the effective volume of water that can flow through.
- Sputtering or uneven flow. The machine starts and stops, hisses, and delivers water in bursts rather than a steady stream.
- Louder pump noise. The motor is working harder than it should to push water through narrowed passages.
- Flat or weak coffee. Scale on the heater means under-heated water, which means under-extracted coffee — and under-extracted coffee tastes thin and lifeless.
- Coffee not as hot as usual. The machine heats, but the water never quite gets where it needs to be.
- Descale light or descale message. The machine is telling you directly. Don’t ignore it — and don’t just dismiss it with a reset.
- Visible white deposits. Check your reservoir walls and the area around the water inlet for chalky residue.
Insider note
Always descale first, then clean the needles separately if your cup is still running short afterwards.
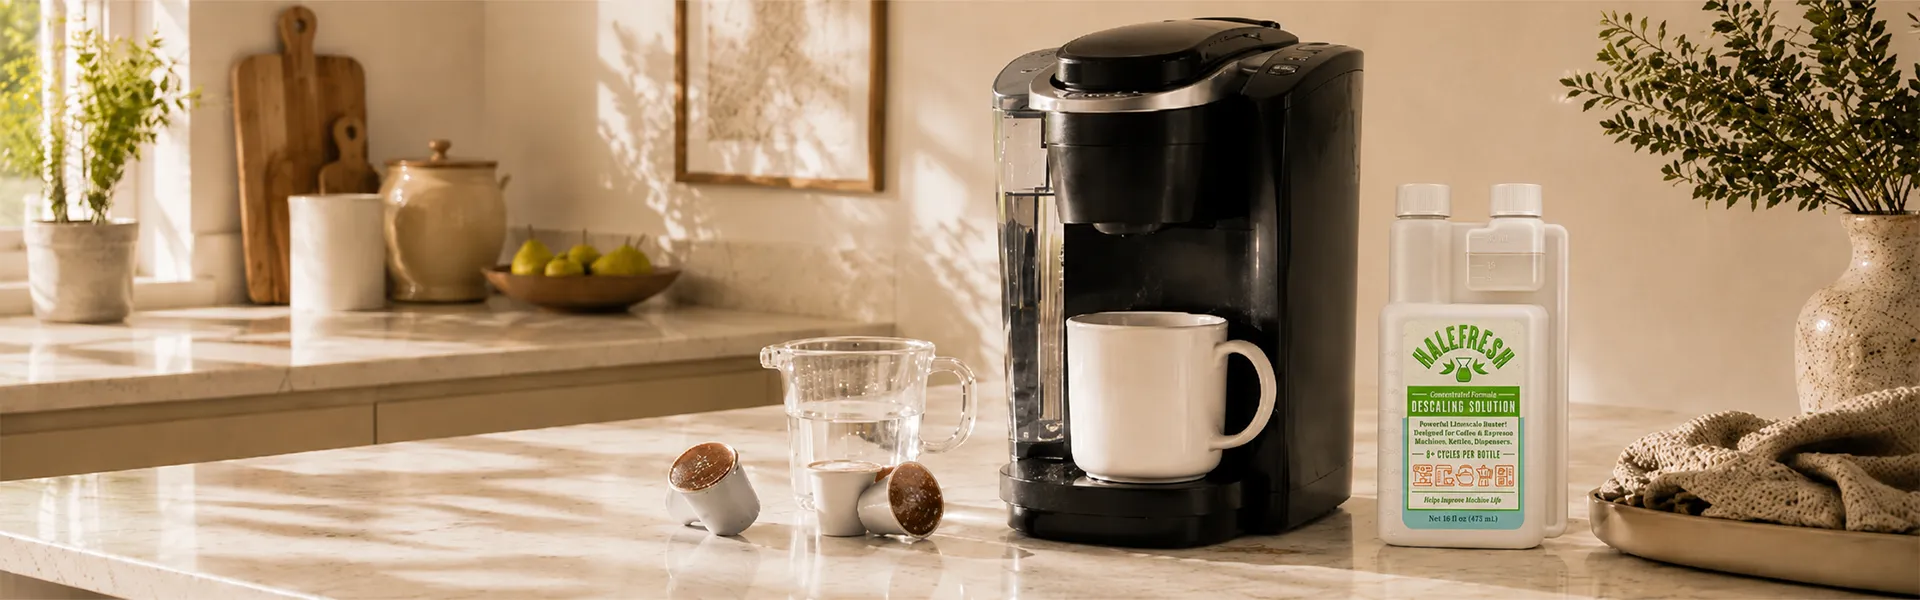
What you Need Before Descaling a Keurig
- Liquid descaling solution (more on this below)
- Fresh, clean water
- A large ceramic mug — at least 16oz capacity — placed under the spout
- Sink access nearby for emptying between cycles.
- A clean cloth for any drips
- Enough time — at least 45 to 60 minutes start to finish, including rinse cycles
- Your model name, if possible (printed on the bottom or in your original box)
Important
How to Descale a Keurig with Descaling Solution
Each step earns the next one.
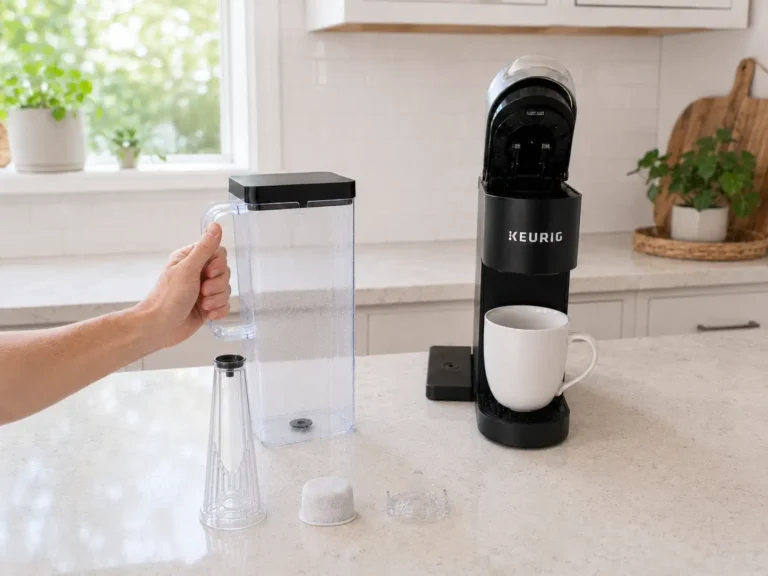
Step 1 - Empty the reservoir and remove the pod
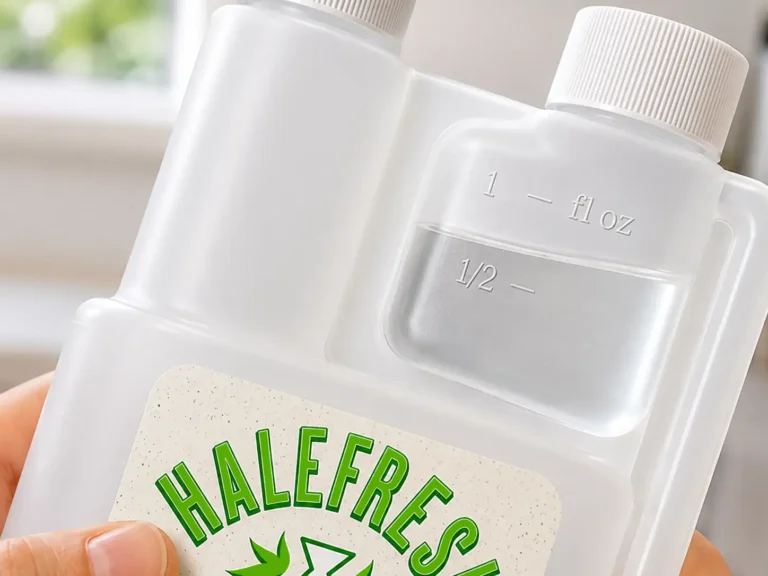
Step 2 - Add descaling solution and water
A liquid descaler dissolves and rinses far more cleanly than powder alternatives, which is one reason it’s the better choice for single-serve machines.
If you’re using Halefresh citric acid-based coffee machine descaling solution, the ratio of descaling solution to water is typically lower than the other brands because the formulation is highly concentrated, and the built-in dosing chamber takes all the guesswork out of measuring. Fill to the line as explained on the label, mix with the prescribed water, and you’re done with this step.
Step 3 - Run the descaling cycle with no pod
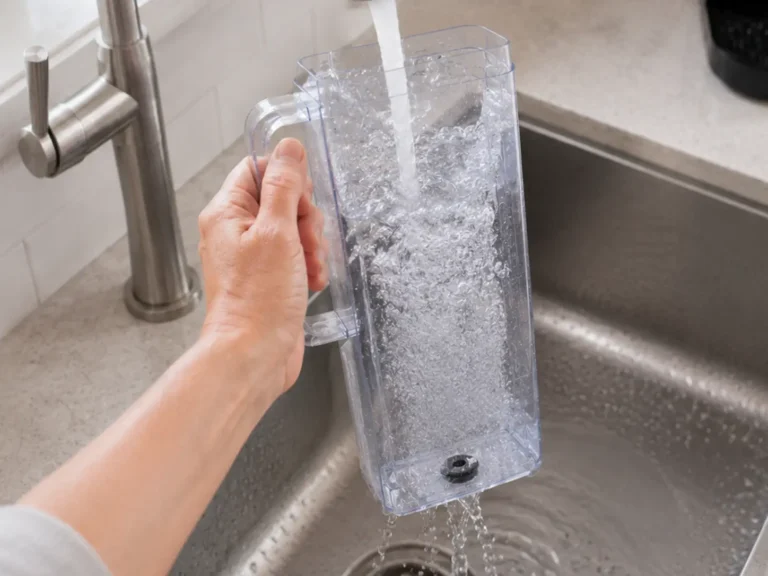
Step 4 - Rinse the reservoir
Step 5 - Run fresh-water rinse cycles
“We once had a customer tell us their Keurig ‘tasted like chemicals’ after descaling. They’d run exactly one rinse cycle. We ran three more together and the problem vanished entirely. Rinse cycles are not optional; they’re half the process.”
How to Descale a Keurig with Vinegar
The honest bottom line
Keurig Descale Light Still On? What to Check
The descale cycle wasn't fully completed
The wrong button sequence was used
The reservoir wasn't refilled to the correct level
Fill to the maximum line every time.
There may be a needle blockage, not just scale
“Scale and needle clogs are two entirely different problems that feel identical. I’ve seen machines descaled three times in a row by frustrated owners when the real issue was a piece of coffee grounds wedged in the exit needle. Thirty seconds with a paper clip would have solved it.”
When to contact Keurig support
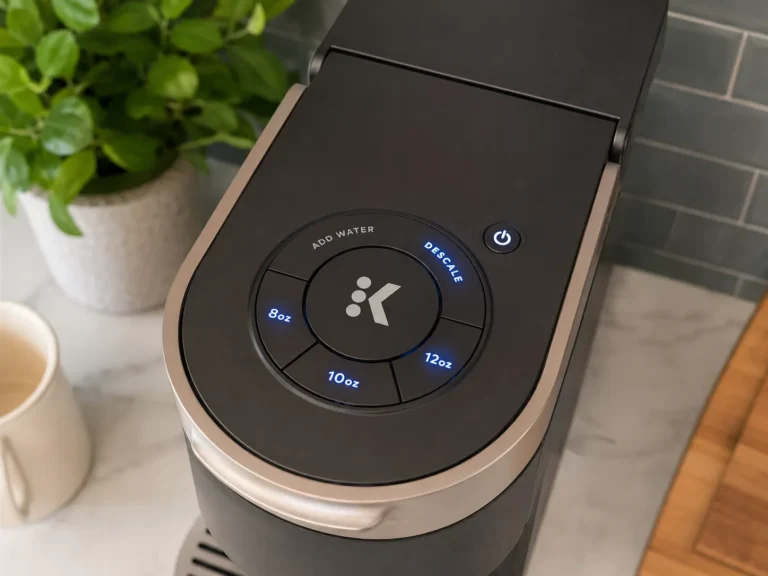
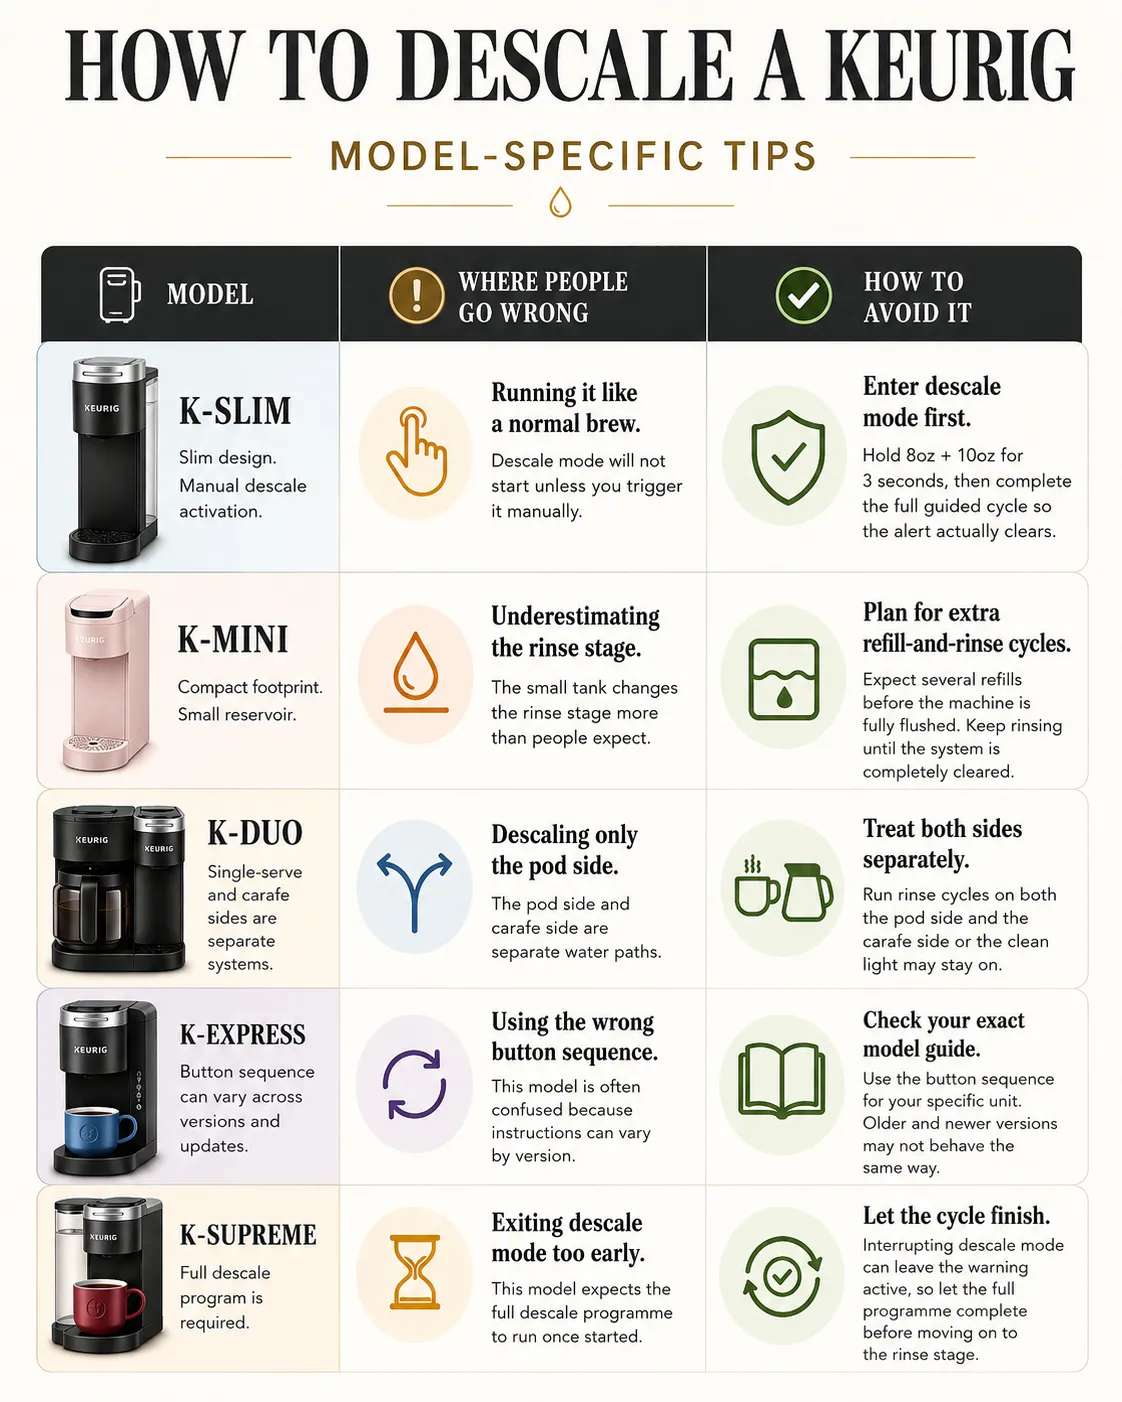
Keurig Model Notes:
K-Slim, K-Mini, K-Duo, K-Express, K-Supreme
Important reminder
How Often Should you Descale a Keurig?
Keurig’s official guidance is clear: descale every three to six months, or when the descale light appears on models equipped with that feature. That’s the baseline. In practice, however, the right frequency depends on your specific situation — and there are three variables that matter far more than the calendar.
| TIMING | BEST FOR | NOTE |
|---|---|---|
| Every 3 months | Hard water users | High mineral content accelerates scale buildup significantly. Don’t wait for a warning light. |
| Every 3 months | Daily brewers | Volume matters. Three or more cups a day means three times the mineral throughput. |
| Every 6 months | Light use + filtered water | Filtered water reduces — but does not eliminate — mineral deposits over time. |
| Sooner | Slow or weak brews | Don’t wait for the calendar or the light. Symptoms mean scale. Act on them. |
“My personal test? I check my kettle. If the inside has started to crust up with white deposits, my Keurig gets descaled that same week — light or no light. Your water doesn’t behave differently in different appliances.”
— A habit We’ve recommended to every Keurig owner
Descaling Solution vs Vinegar for a Keurig
Option: Descaling solution
Option: White vinegar
Weaknesses: Strong smell. Taste can linger for days. Some models advise against it. Requires far more rinsing.
Option: Citric-acid solution (e.g. Halefresh)
Weaknesses: Still requires thorough rinsing. Must verify compatibility with your specific machine.
What Not to Do When Descaling a Keurig
Knowing what to avoid is just as important as knowing the correct steps. These mistakes are extremely common, and every single one of them creates an easily preventable problem.
Don’t descale with a pod inserted. Hot descaling solution running through a K-Cup creates a messy, unpredictable result. Remove the pod. Always.
- Don’t stop before rinse cycles are complete. Stopping early is why descale lights stay on, and coffee tastes off. Commit to the full process every time.
- Don’t use a paper cup. Hot, acidic descaling liquid will buckle a paper cup. Use a large ceramic mug without exception.
- Don’t confuse cleaning pods with descaling. Keurig cleaning pods remove surface coffee residue. They do not descale the internal water path. These are completely separate maintenance tasks.
- Don’t ignore slow brewing after the descale light turns off. If your cup is still small or slow after descaling, check the needles. Don’t keep descaling — the problem has changed.
- Don’t run repeated acid cycles if you suspect a blockage. If the machine is producing very little water despite multiple descale attempts, an internal blockage — not scale — may be the cause. Contact support.
- Don’t forget to remove the water filter first. Running descaling solution through the water filter damages the filter and reduces the effectiveness of the descale. Take it out before you start.

